| Welcome to Sprocket School! This project is maintained by volunteer editors. Learn more about how this works. |
Simplex X-L: Difference between revisions
Jump to navigation
Jump to search
JesseCrooks (talk | contribs) m (JesseCrooks moved page Simplex XL to Simplex X-L: The model name includes a dash.) |
JesseCrooks (talk | contribs) m (Added dash to model name.) |
||
| Line 21: | Line 21: | ||
*Turn the mechanism by hand to advance a few frames of film. Run fingers over each sprocket (Items 1, 6, 9) to ensure that the sprocket teeth are centered in the film perforations, and the film is centered on the sprockets. Double check the position of the film in the framing aperture (Item 12). A correct frame image in the framing aperture ensures correct frame positioning in the picture aperture (Item 11). The framing knob (Item 7) can be used to correct misframes, but doing so reduces the framing range during playback. It is advisable to open the gate and rethread with the framing knob in its center position. | *Turn the mechanism by hand to advance a few frames of film. Run fingers over each sprocket (Items 1, 6, 9) to ensure that the sprocket teeth are centered in the film perforations, and the film is centered on the sprockets. Double check the position of the film in the framing aperture (Item 12). A correct frame image in the framing aperture ensures correct frame positioning in the picture aperture (Item 11). The framing knob (Item 7) can be used to correct misframes, but doing so reduces the framing range during playback. It is advisable to open the gate and rethread with the framing knob in its center position. | ||
[[File:Simplex intermittent sprocket.JPG|left|thumb|300px| Intermittent sprocket on a Simplex | [[File:Simplex intermittent sprocket.JPG|left|thumb|300px| Intermittent sprocket on a Simplex X-L projector. Observe its range of motion and set to the center of its travel before threading. See [[Framing]] for more details.]] | ||
*Thread the soundhead as instructed in the soundhead manual. A slight degree of film tension is required above the feed sprocket (Item 1) and below the soundhead. This prevents the film from snapping on motor start. | *Thread the soundhead as instructed in the soundhead manual. A slight degree of film tension is required above the feed sprocket (Item 1) and below the soundhead. This prevents the film from snapping on motor start. | ||
==External Links== | ==External Links== | ||
* [http://www.film-tech.com/warehouse/index.php?category=2#Projectors Film-Tech manuals page] - A PDF manual for the Simplex | * [http://www.film-tech.com/warehouse/index.php?category=2#Projectors Film-Tech manuals page] - A PDF manual for the Simplex X-L is available here. | ||
* [http://www.film-tech.com/warehouse/manuals/STRSIMPLEXHIST.pdf History of the Simplex Projector by John Cannon] | * [http://www.film-tech.com/warehouse/manuals/STRSIMPLEXHIST.pdf History of the Simplex Projector by John Cannon] | ||
Revision as of 20:23, 8 May 2020
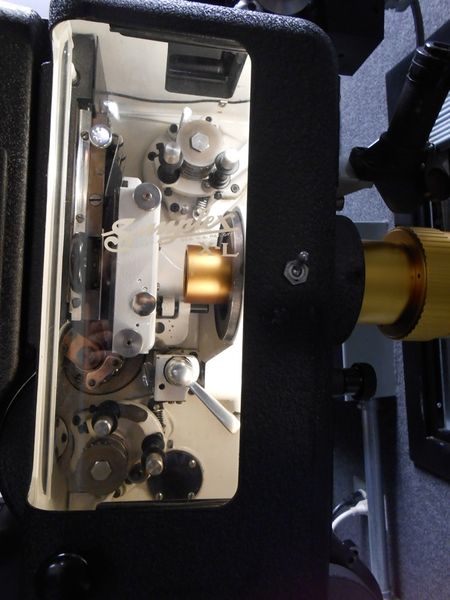
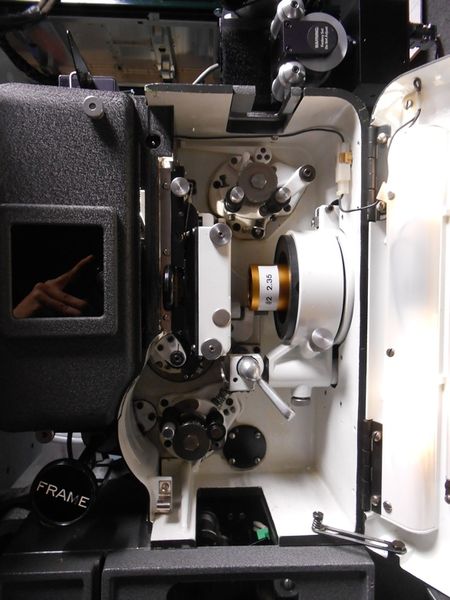
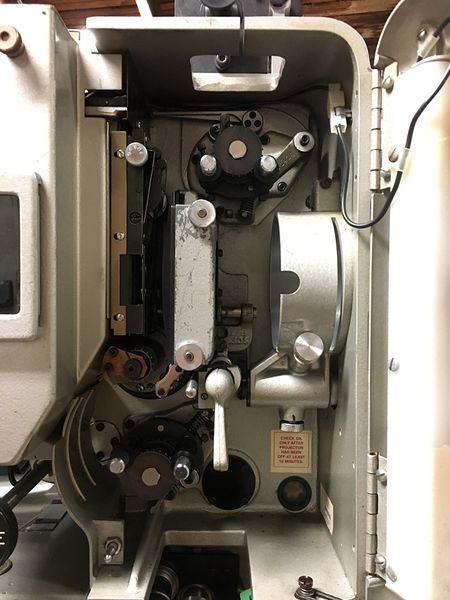
A 35mm projector made by Simplex.
Threading
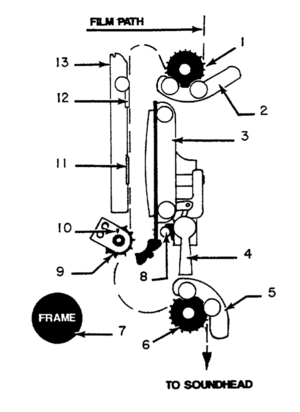
For general information about threading projectors, see threading
- Rotate the framing knob (Item 7) to its center position (FRAME reading level, as shown). Using the motor knob (SH-1000 soundhead) or the soundhead flywheel (5-Star soundhead), turn the mechanism by hand to place the intermittent sprocket (Item 9) in its rest position. In the rest position, the index mark (Item 10) will align with one of the painted white index markers on the intermittent shaft collar when stopping after sprocket rotation.
- Open the pad roller assemblies (Items 2, 5). Open the film gate (Item 3) by moving the gate opening lever (Item 4) forward. The gate will lock in position (as shown).
- Dismount the film gate by removing the (2) chrome knurled nuts. Use a clean, dry cloth to wipe down all film bearing surfaces of the gate and trap (Item 13). Replace the film gate and nuts. This should be performed at each threading operation.
- Thread the film as illustrated. Engage the film on the intermittent sprocket (Item 9), and check for correct framing at the framing aperture (Item 12). When correct, close the gate by firmly holding the gate opening lever and tripping the gate release (Item 8). Walk the lever back by hand to prevent the gate from slamming into the trap with excessive force. Form loops above and below the gate as illustrated, and close the pad roller assemblies (Item 2, 5).
- Turn the mechanism by hand to advance a few frames of film. Run fingers over each sprocket (Items 1, 6, 9) to ensure that the sprocket teeth are centered in the film perforations, and the film is centered on the sprockets. Double check the position of the film in the framing aperture (Item 12). A correct frame image in the framing aperture ensures correct frame positioning in the picture aperture (Item 11). The framing knob (Item 7) can be used to correct misframes, but doing so reduces the framing range during playback. It is advisable to open the gate and rethread with the framing knob in its center position.
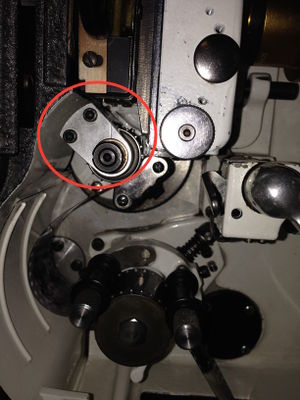
- Thread the soundhead as instructed in the soundhead manual. A slight degree of film tension is required above the feed sprocket (Item 1) and below the soundhead. This prevents the film from snapping on motor start.
External Links
- Film-Tech manuals page - A PDF manual for the Simplex X-L is available here.
- History of the Simplex Projector by John Cannon
